Laser software for Windows
Put the design where the material is
Draw or import a design, see your material through the camera, drop the design on it, and run the job. One program, from the first line to the last cut.
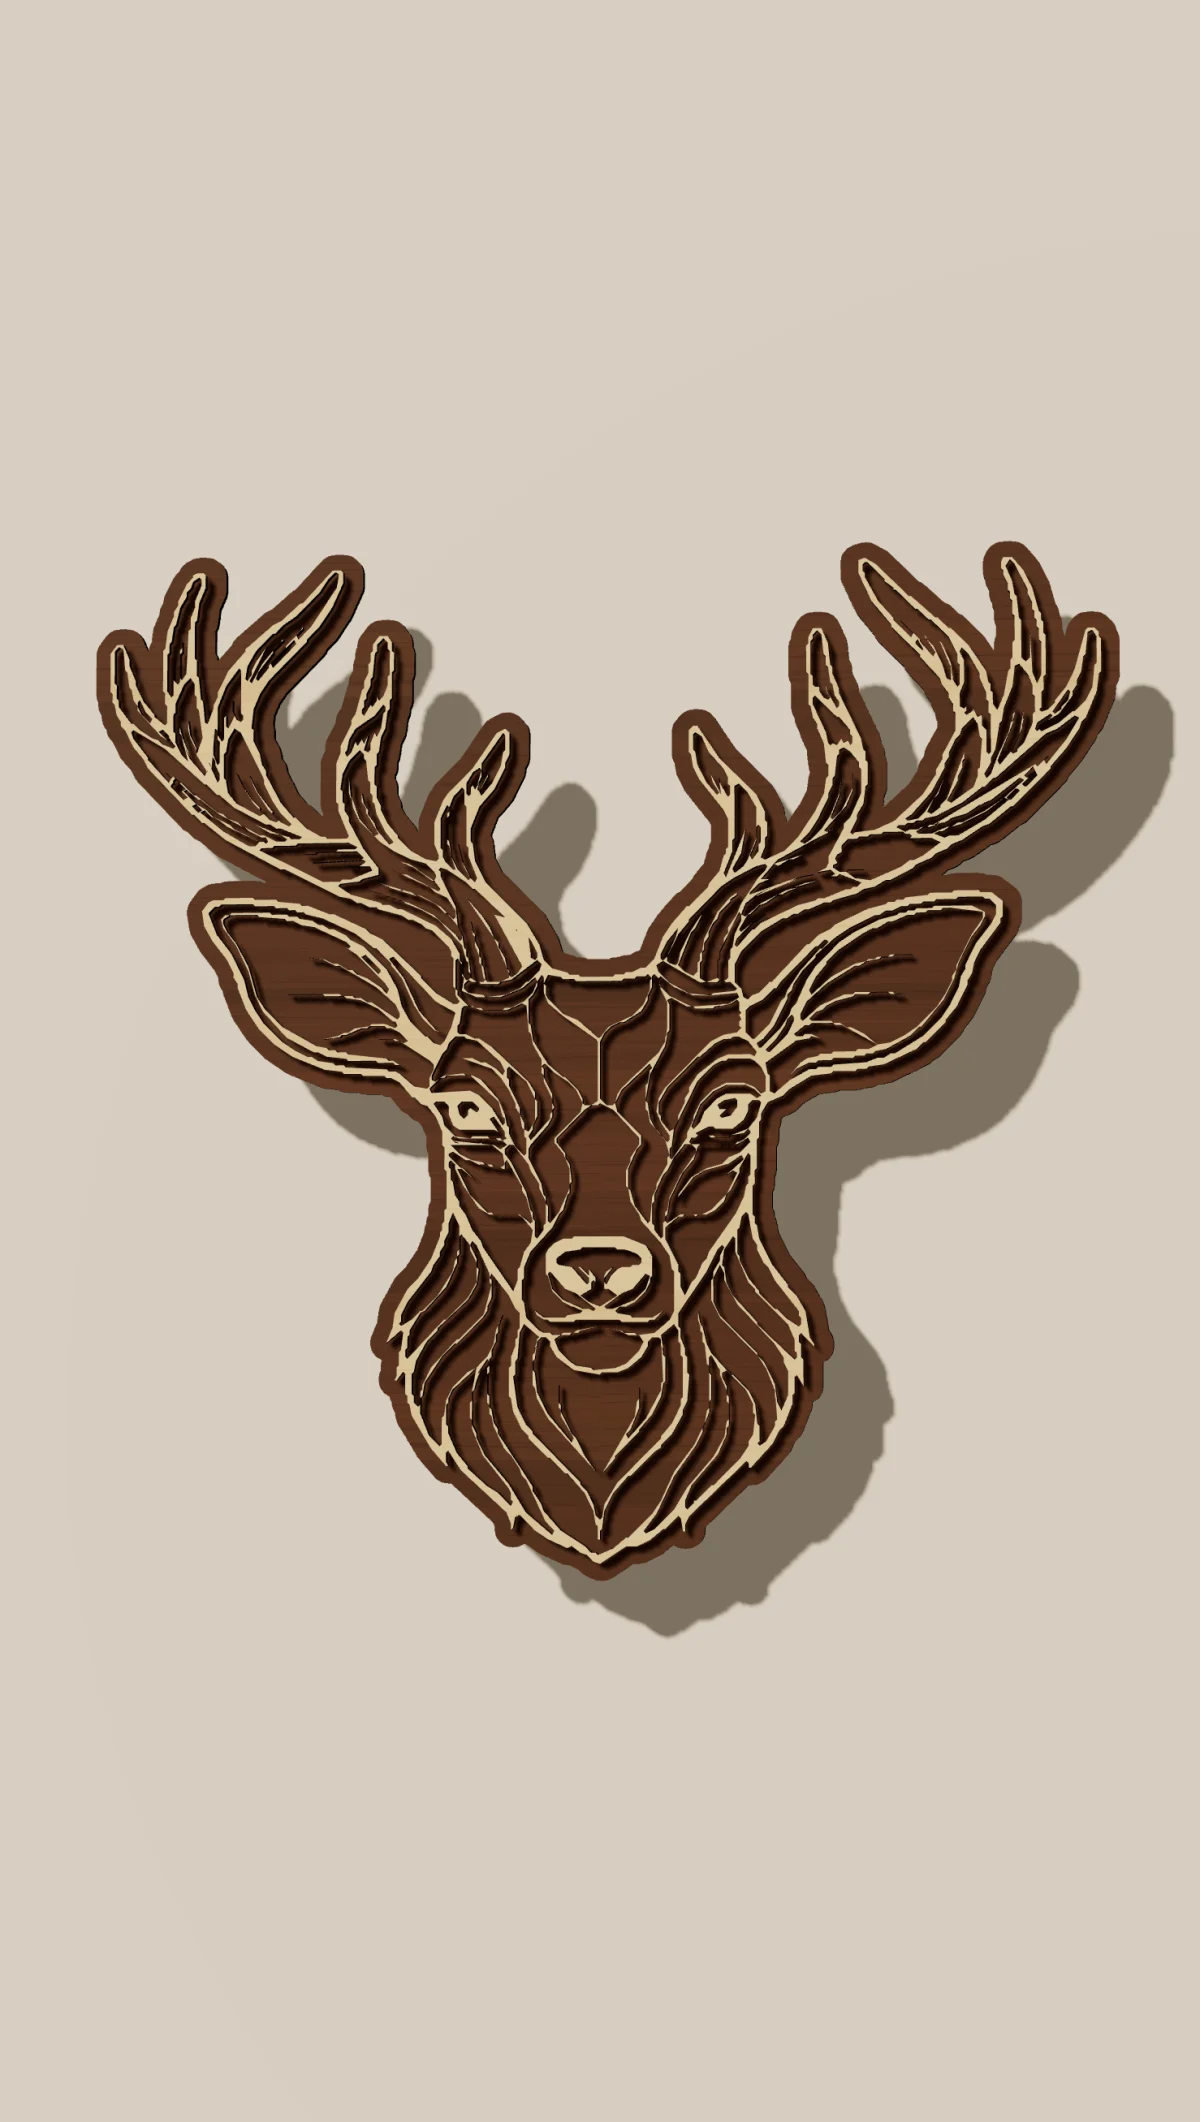
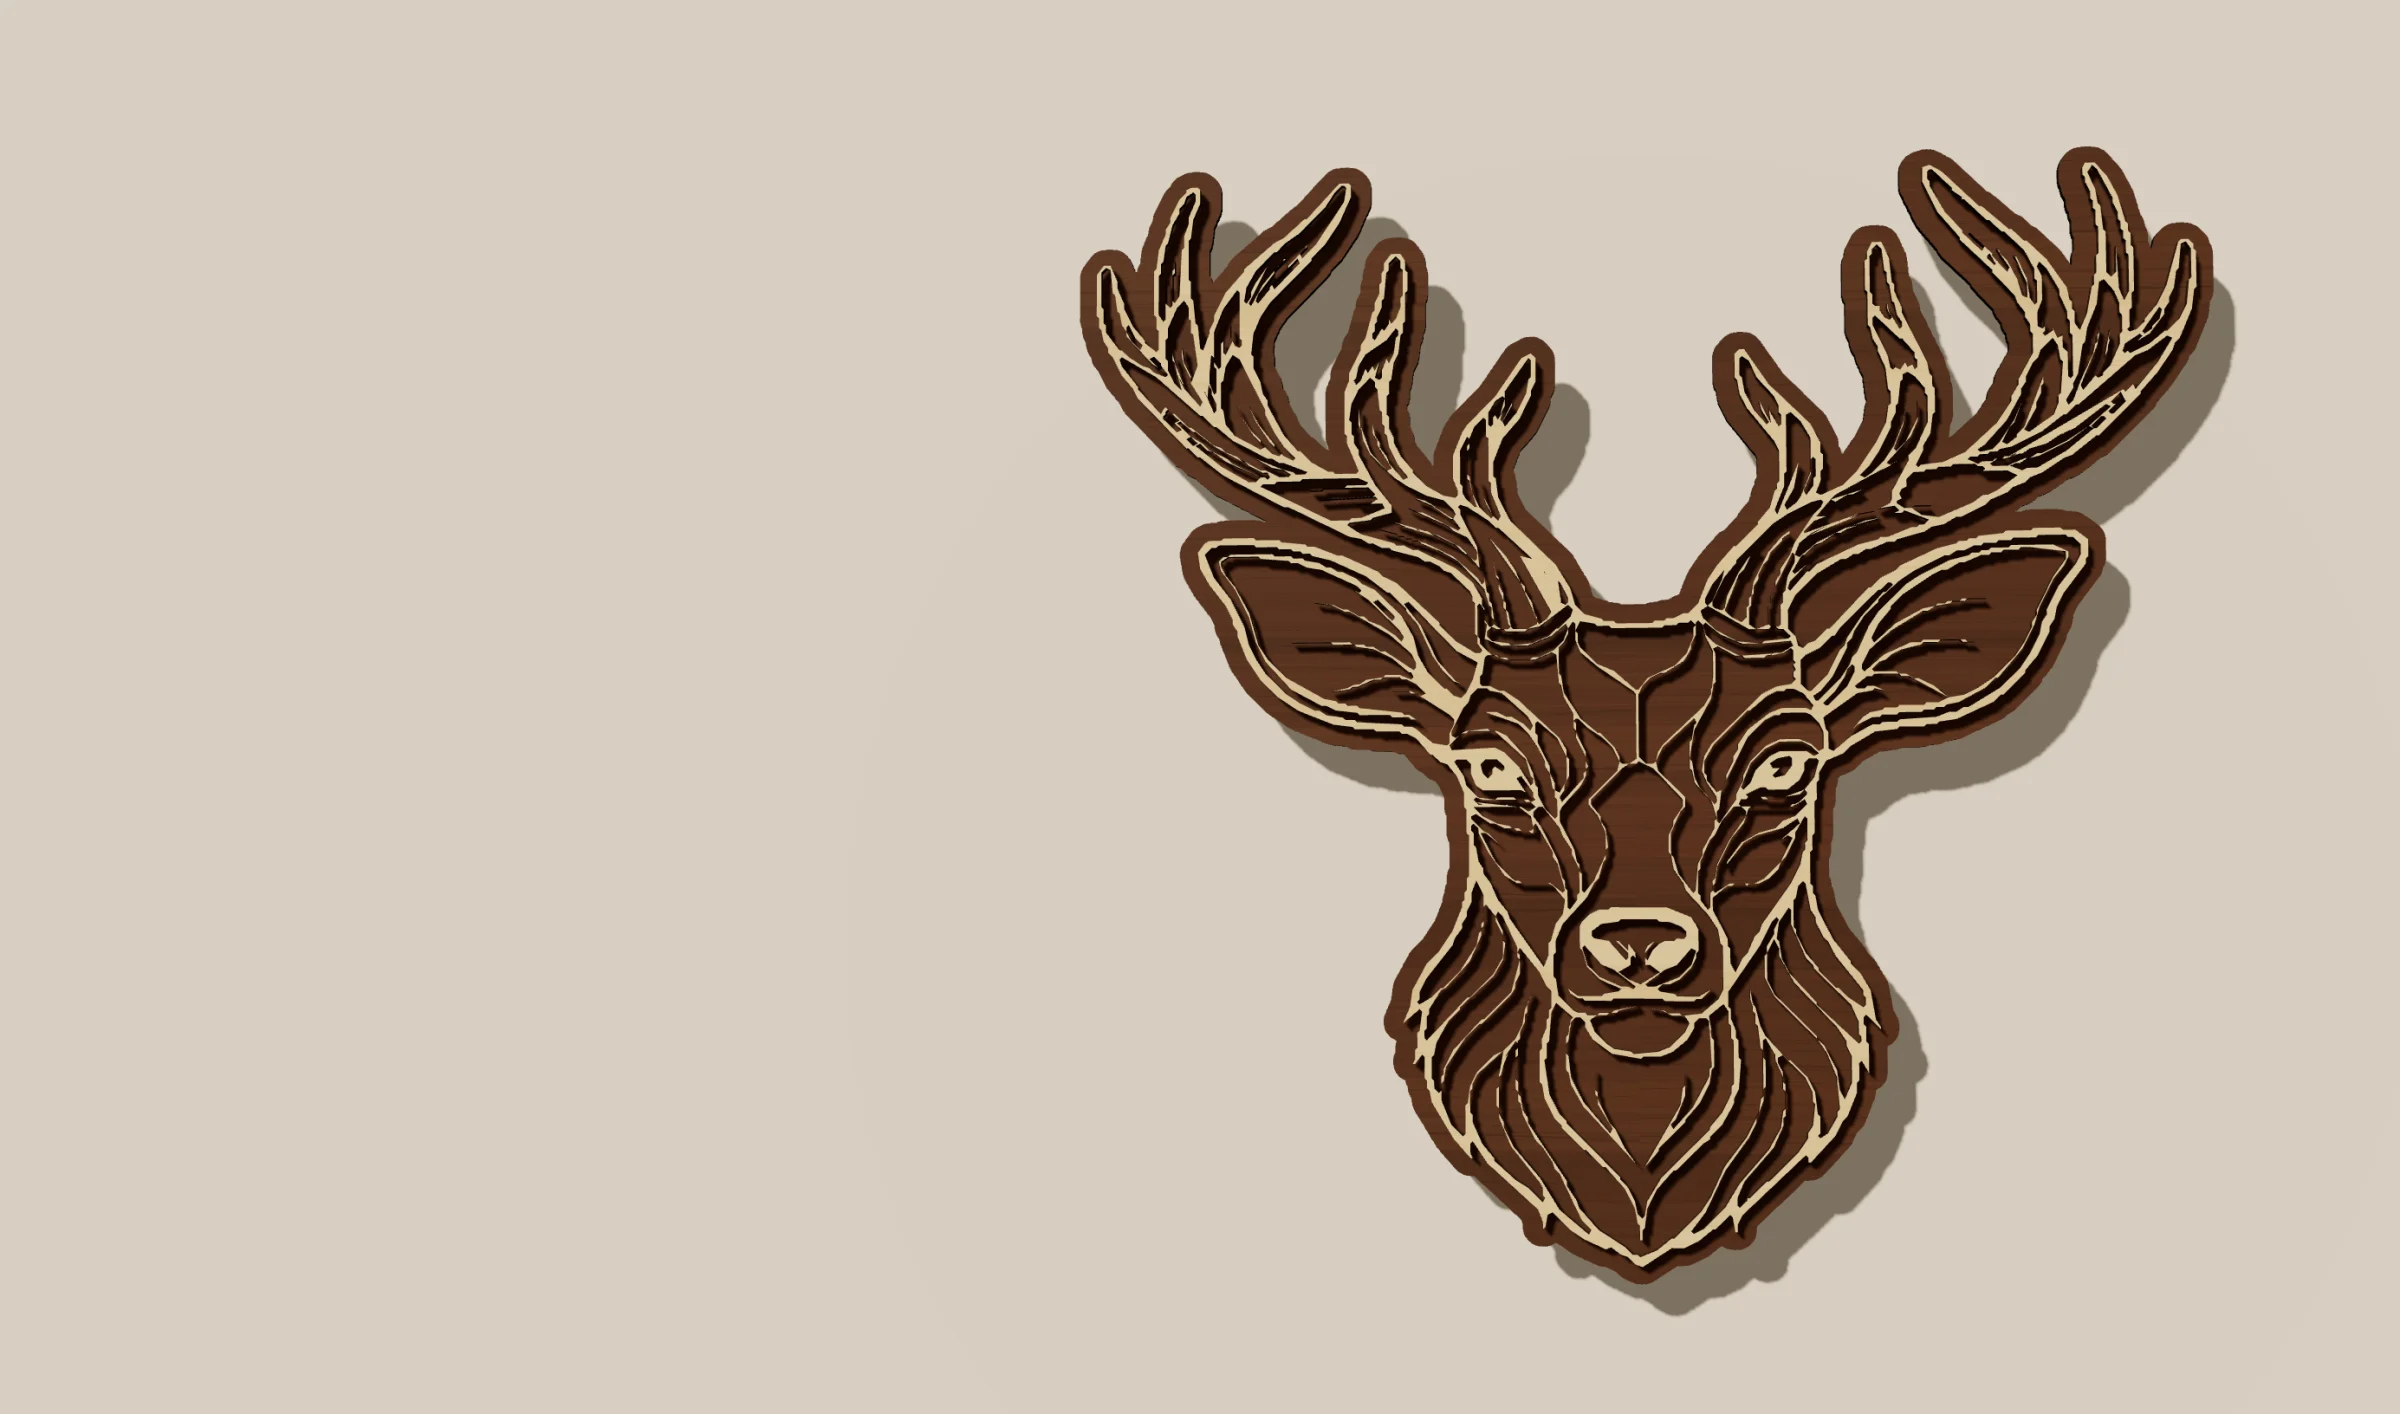
A deer head cut from birch plywood, standing off a walnut back on a wall. A laser spot runs along its cut lines.
Draw it. See it on the bed. Cut it where it belongs.
The main window
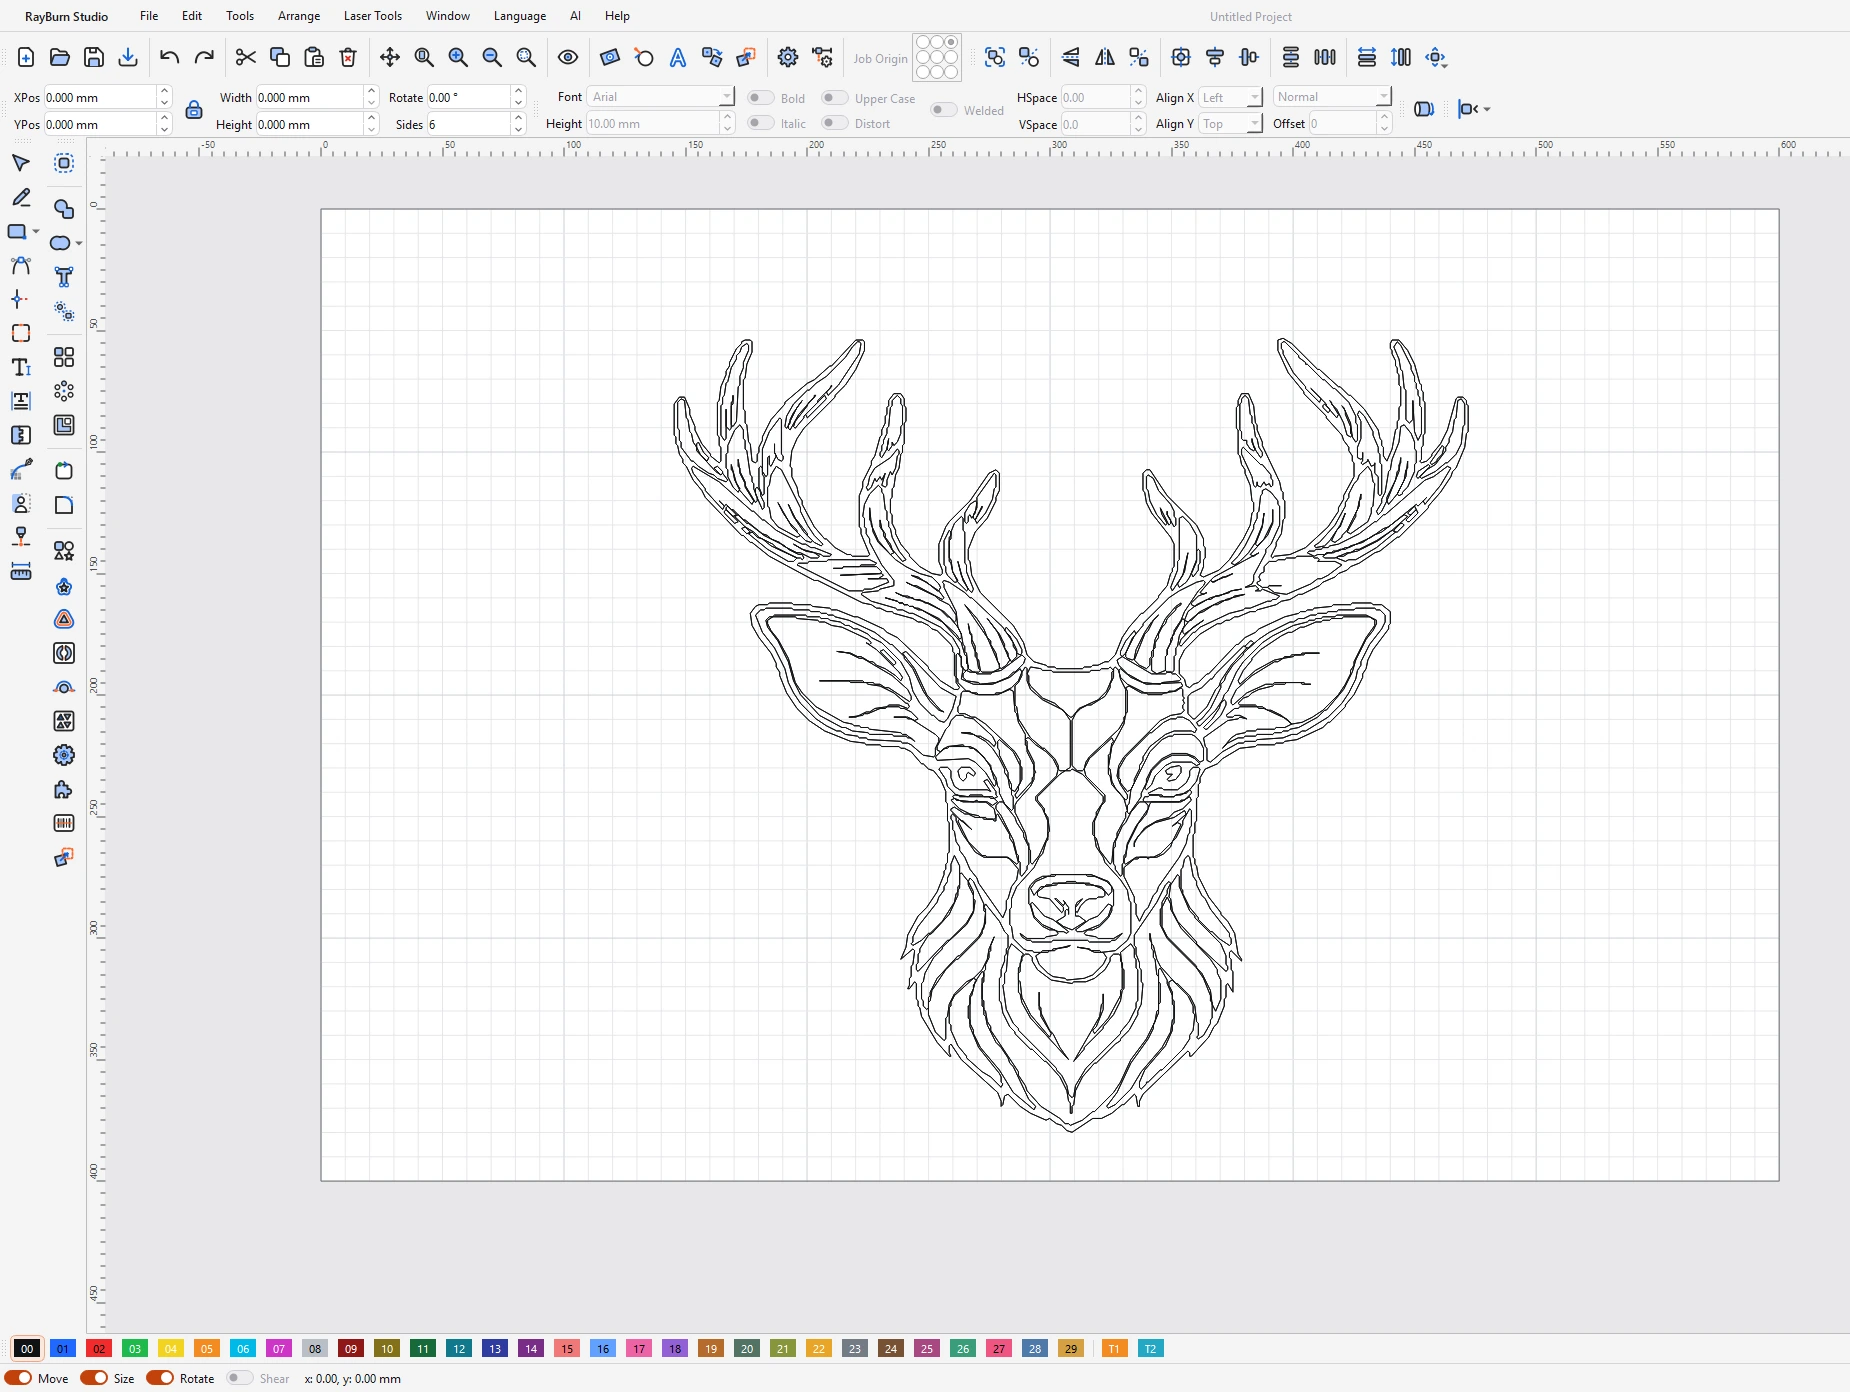
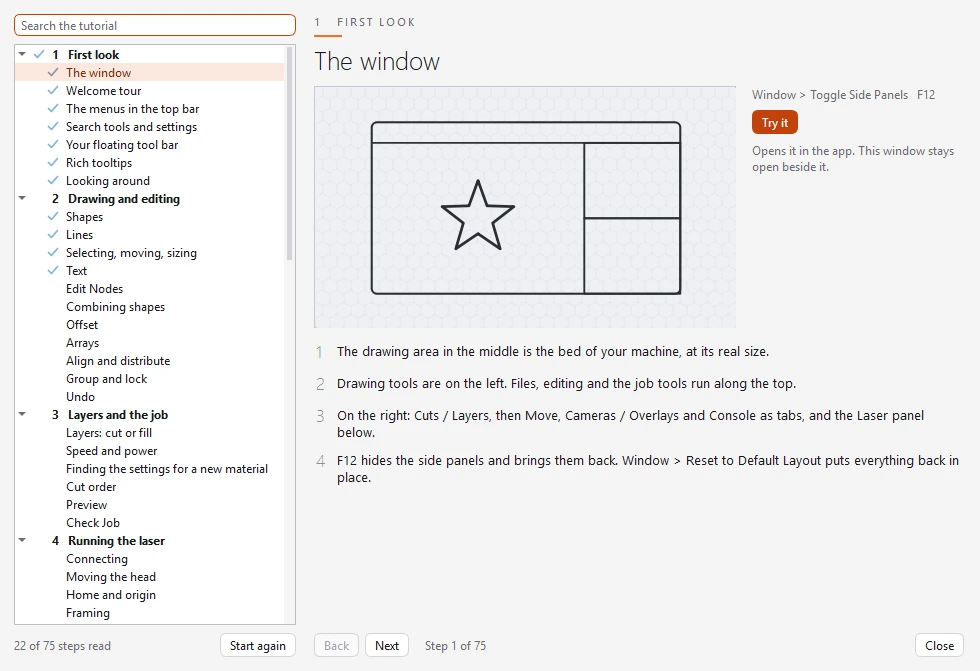
The drawing area is the bed of your machine at its real size. Drawing tools on the left; files, editing and the job tools along the top; every colour in the palette is a layer with its own speed and power.
Main window. The panels for layers, camera and laser sit to the right of this view.New in 5.3
Recorded in the program itself. Point at a clip to play it.
Fast with big designs
Thousands of shapes draw, move, zoom and select without a pause. The job is made ready in the background while you work, so Start answers at once.
Preview the whole job
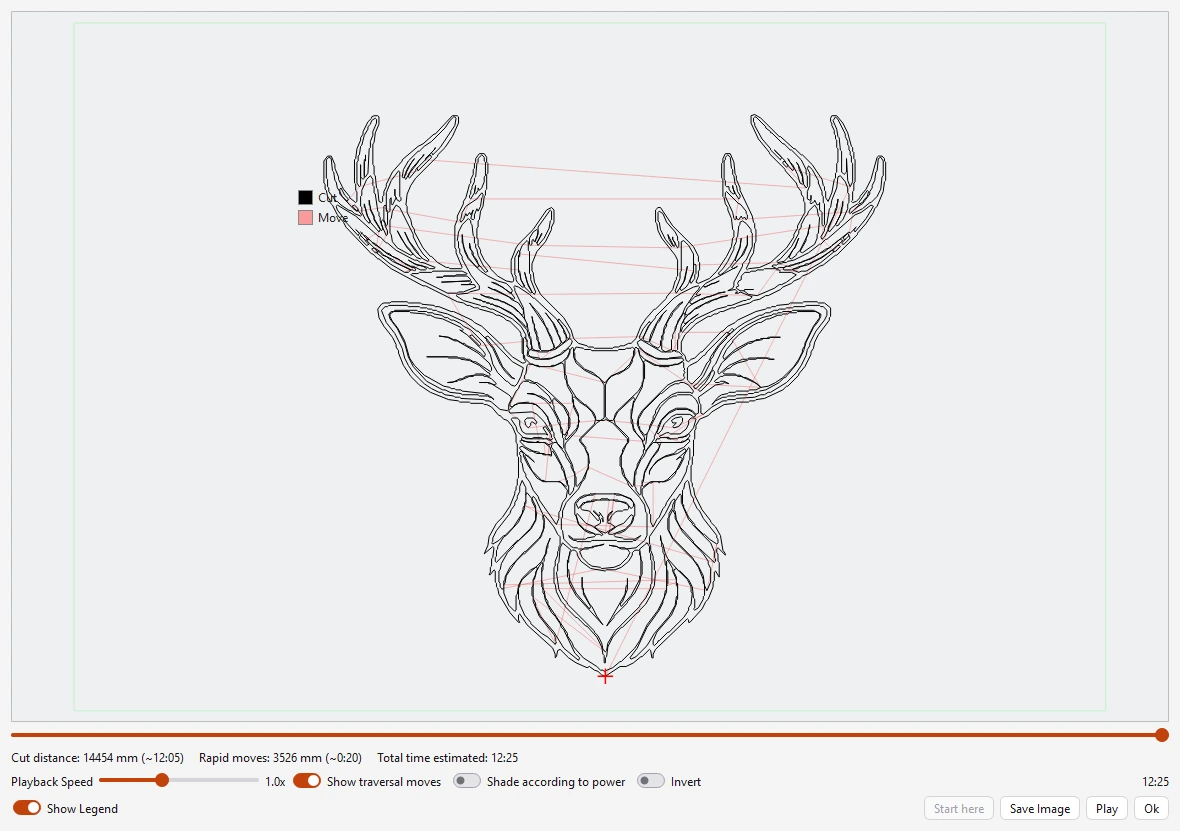
Every cut in its order, the travel moves between them and the time it takes, before anything burns.
Remove Background
Finds the subject of a photo by itself. What becomes transparent is never engraved.
Gear Maker
Spur gears from the teeth and the module, with a centre hole, spokes and a matching gear that meshes.
Puzzle Generator
A jigsaw of any size and number of pieces, with the tab shape and a random pattern of your choice.
Barcode Generator
QR, Data Matrix, Code 128, EAN-13 and more, from text, a web address, Wi-Fi details or a contact card.
Box Maker
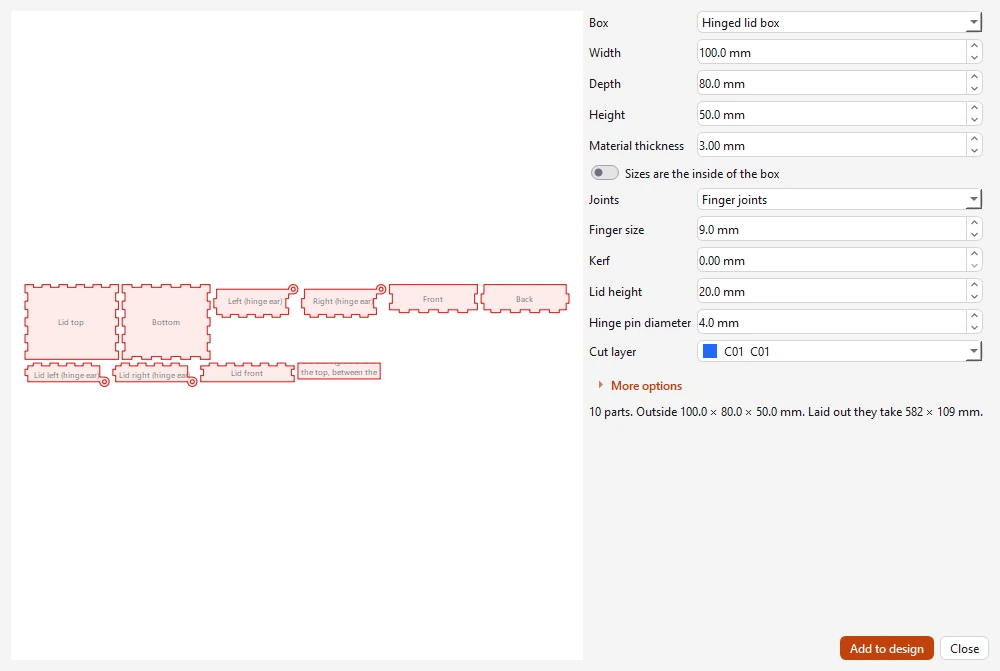
Boxes with finger joints, hinged lids, dividers and drawers, laid out flat and ready to cut.
Widen Letters
Thin strokes made thick enough to survive the cut, in Latin and Arabic script.
Art Library
Add your art libraries and pick any single design from a sheet, with 42 basic shapes built in.
A sharper overlay
The camera's full detail, up to 16 megapixels, under your design.
Optical Zoom
Zoom a zoom-lens camera from the workspace; the overlay stays in place. Up to 4K.
Align to Previous Cut
Put a sheet back after a cut that did not go through; the camera finds the old cut.
Boundary, Contour, Stencil
Outlines round a design, offsets, and bridges that keep letter islands in place.
Shape Multiply
As many copies as fit on the sheet or the material, in a grid or nested tightly.
Welcome Tour and lessons
A tour of the window at the first start, and a chapter on aligning the laser's mirrors.
Five themes
Light, Dark, Pink, Green and Purple, with several icon styles.
A camera that knows your bed
A USB camera over the bed shows the material under your design. A calibration tells the program which camera pixel is which point of the bed, in millimetres, so a design placed on the picture lands on the same spot of the material.
The live overlay
Switch it on and the bed, as the camera sees it, appears under your design. Drag the design onto the material in the picture. A slider sets how strongly the picture shows.
CtrlShiftO
Calibration from an engraved target
The laser engraves a grid of dots on scrap and the camera finds them. Do it once, and again when the camera was re-mounted.
Cal check with a check target
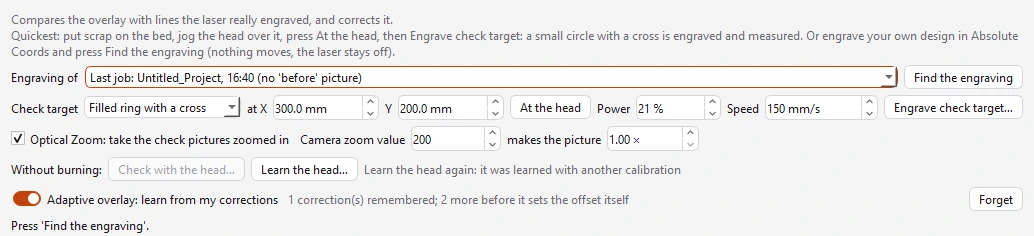
A 10 mm circle with a cross, engraved on scrap. The camera measures how far the overlay shows it from where it was really engraved, and Apply takes the correction.
Checking with the head, nothing burned
The head visits five places with the laser off. Later it visits them again, and the difference in where the camera sees it is the overlay's error.
An overlay that learns
Every correction you apply is remembered with where the camera sat. After three, the usual offset is set by itself whenever the camera has moved, never more than 3 mm in one step.
Any camera resolution
One calibration works at every size with the same proportions: 1920 x 1080, 1280 x 720 and 960 x 540 are the same picture. Bigger gives a sharper overlay.
A flicker filter for LED light
LED strips make bands roll through a camera picture. The filter takes them out at any frequency, and nothing has to be set.
For a camera on the lid: white stickers on the machine's fixed frame keep the overlay locked in place when the lid closes a little differently each time.
The design finds the part
Two tools use the camera to do the measuring you would do with a ruler and a test frame.
Fit to Material
Lay a piece on the bed. The camera takes a picture, outlines the pieces it finds, and you click yours. A round design becomes concentric with a disc; a box is centred on a rectangle and turned to its edges.
Scale, distance from the edge, rotation and fine offsets are yours to set. Apply moves the design in one undo step.
A clear piece the camera cannot see is marked by hand: Mark a circle, or Mark a rectangle.
CtrlAltF
Repeat on Parts
A batch of like parts, one design. Show the camera the first part with the design where it belongs. Then lay the next one down, turned any way: the camera finds it and puts the design on it.
Or lay several down at once. Put on all parts gives each its own copy, turned as the part lies, and one Start engraves them all.
Every Start is your own click, with its confirmation. Nothing fires by itself. Not for clear parts the camera cannot see.
CtrlAltR
Letters and edges that come out right
Widen Letters
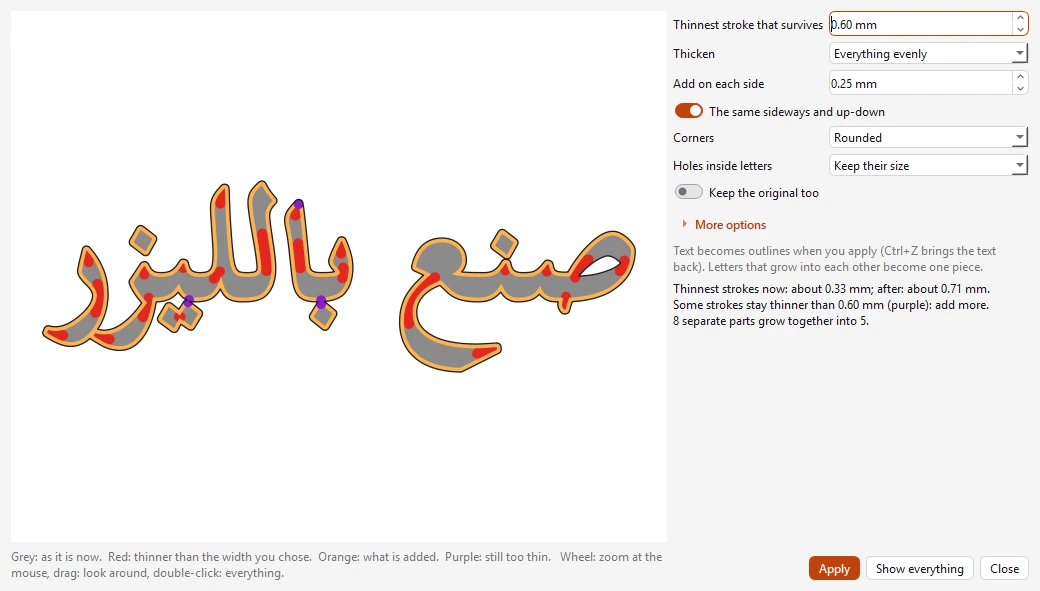
Thin strokes melt in acrylic and burn away in wood, and fine Arabic faces suffer most. Set the thinnest stroke that survives: only the strokes thinner than that grow to it, and everything already thick enough keeps its exact outline.
Or thicken everything evenly, with separate amounts sideways and up-down.
CtrlAltW
Lead-in and lead-out lines
Where a cut starts, the beam leaves a small mark. A lead puts that mark in the waste: outside a part, inside a hole.
Choose a straight line or an arc that meets the cut smoothly, set its length and angle, and see every closed shape with its leads before you apply.
From a picture to clean lines
Vectorize Image
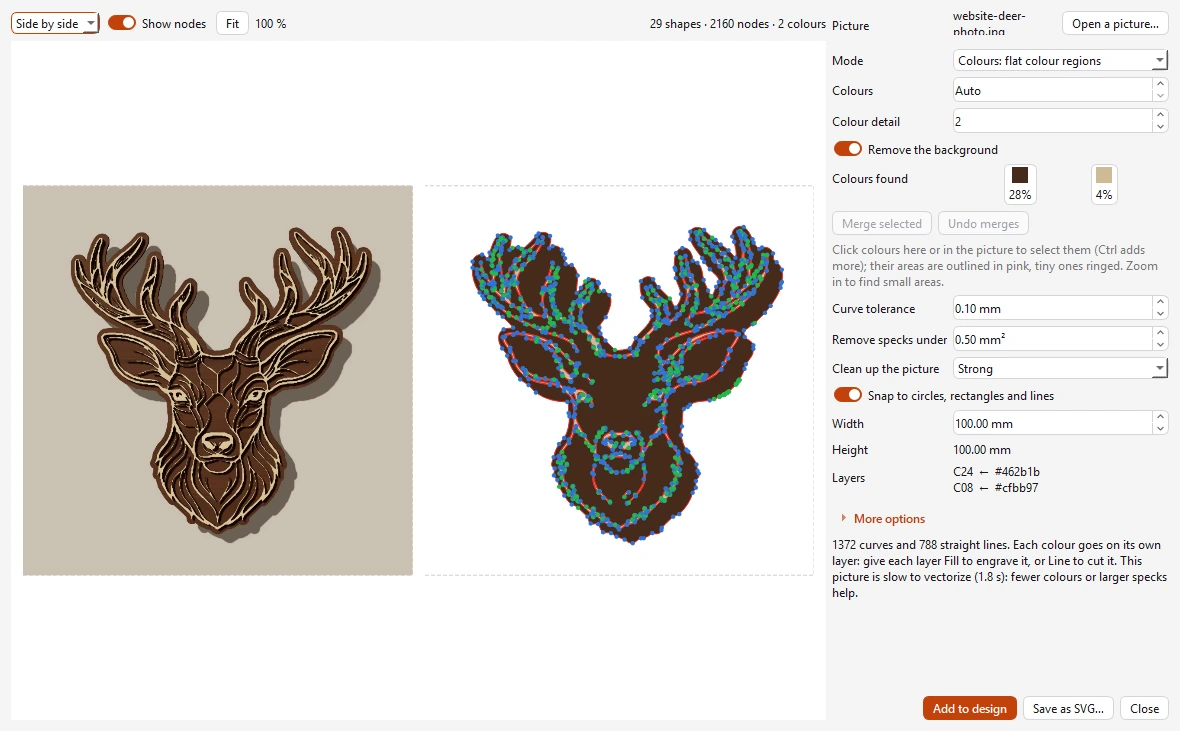
A picture rebuilt as vector shapes: smooth curves, sharp corners, exact circles and straight lines. Outline in black and white, or flat colours. Auto finds how many colours the picture really has; click the ones that belong together and merge them. Each colour goes on its own layer, or save the result as SVG.
Made for drawings and logos. A photo works too, but takes longer and gives many nodes.
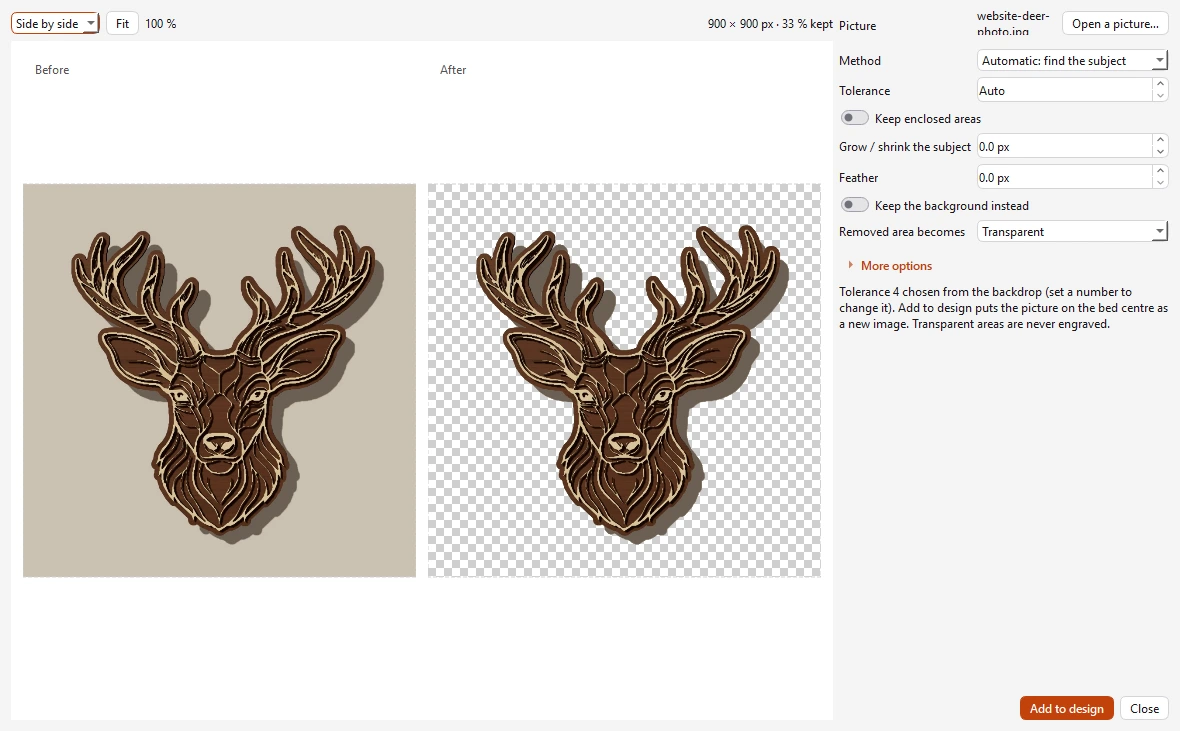
Remove Background
Automatic, or click the background colour in the picture. Tolerance, grow or shrink, and a soft edge tidy the outline, with before and after side by side. Parts that became transparent are never burned.
Weak on busy photo backgrounds, on hair, and on subjects the colour of the backdrop.
Tools that make the part
Drawing, editing and a set of makers, so a simple job never has to leave the program.
Nesting
Packs parts by their real outlines to save material, with the gap and the rotation you allow. Small parts can go into the cut-out holes of bigger ones.
CtrlShiftN
Box Maker
Finger-jointed boxes laid out flat, ready to cut: basic, hinged lid, dividers, drawers, sliding lid, parts bin, polygon or curved. Give the sizes, the material thickness and your kerf.
Block of Text
Type a few lines. Each is stretched to the same width, and the lines are stacked and welded into one outline: a coaster or a sign in one piece.
Detect Shapes on Sheet
Lay a sheet with drawings, stickers or prints on the bed. A boundary is drawn round each one, at the cut distance you set, ready to cut.
CtrlAltD
Drawing and node editing
Shapes, lines, text, booleans, offsets and arrays. In Edit Nodes, drag a box over the nodes you want, then move, nudge or delete them together.
Preview and Check Job
Preview plays the whole job before anything burns: the order, the travel moves and the time. Check Job looks it over for speed limits, open shapes and objects off the bed.
AltP
Help where your hand is
The moving drawings on this page are the program's own. They are what you see when the mouse rests on a tool.
A built-in Tutorial
75 steps in 10 chapters, laser alignment among them, each with a moving picture and a Try it button that opens the tool. It remembers what you have read.
Animated tooltips
Rest the mouse on any tool: a small moving picture shows what it does, with its name, its shortcut and a sentence or two.
Search
Type a few letters of any tool, command or setting and press Enter.
CtrlAltK
A floating tool bar you fill yourself
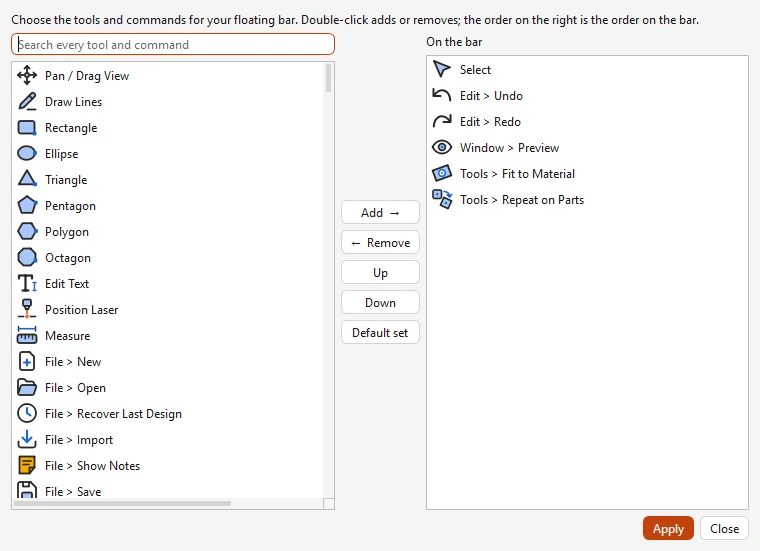
A small bar that floats over the drawing. Choose the tools on it and drag it to where you work. Its tools and its place are remembered.
An AI assistant that knows your machine
Ask in plain words: why a cut did not go through, what a controller message means, which setting to change. The assistant looks at the machine's status, the camera calibration, your design and the log, and answers for your setup. Ask it for a drawing and add it to the design with one click.
Works with the AI service you choose, or with a model running on your own computer.
English and Arabic
The Language menu switches the whole interface between English and Arabic. Arabic is laid out from right to left.
Screens from the program
Try it on your own machine
Thirty days, every function, no key needed. Install it, connect your laser, start the camera, and see where your next design lands.
Lasers are dangerous. Never leave a running laser unattended.